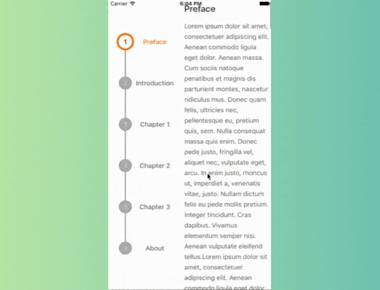
Vertical Step indicator
May 06, 2023
1 min

In this tutorial, we are going to learn how to create a custom Checkbox component in React Native application for Android and iOS platforms. We will learn step by step how to get Multiple checkboxes values on button click using React Native APIs.The Checkbox is and HTML element. It is a square box that can be checked (ticked) or unchecked, and it is used to select any number of values among given options.
This does't required any special installation of dependacies
import React, { Component } from 'react';import {Alert,Image,Platform,StyleSheet,Text,TouchableHighlight,View} from 'react-native';import PropTypes from 'prop-types';class SelectedCheckboxes {constructor() {selectedCheckboxes = [];}addItem(option) {selectedCheckboxes.push(option);}fetchArray() {return selectedCheckboxes;}}class Checkbox extends Component {constructor() {super();this.state = {checked: null}}componentDidMount() {if (this.props.checked) {this.setState({ checked: true }, () => {this.props.checkedObjArr.addItem({'key': this.props.keyValue,'value': this.props.value,'label': this.props.label});});} else {this.setState({checked: false});}}stateSwitcher(key, label, value) {this.setState({ checked: !this.state.checked }, () => {if (this.state.checked) {this.props.checkedObjArr.addItem({'key': key,'value': value,'label': label});} else {this.props.checkedObjArr.fetchArray().splice(this.props.checkedObjArr.fetchArray().findIndex(y => y.key == key), 1);}});}render() {return (<TouchableHighlightonPress={this.stateSwitcher.bind(this, this.props.keyValue, this.props.label, this.props.value)}underlayColor="transparent"style={{ marginVertical: 20 }}><View style={{flexDirection: 'row',alignItems: 'center' }}><View style={{padding: 4,width: this.props.size,height: this.props.size,backgroundColor: this.props.color}}>{(this.state.checked)?(<View style={styles.selectedUI}><Image source={require('./assets/tick.png')} style={styles.checkboxTickImg} /></View>):(<View style={styles.uncheckedCheckbox} />)}</View><Text style={[styles.checkboxLabel, { color: this.props.labelColor }]}>{this.props.label}</Text></View></TouchableHighlight>);}}export default class App extends Component {constructor() {super();CheckedArrObject = new SelectedCheckboxes();this.state = { pickedElements: '' }}renderSelectedElements = () => {if (CheckedArrObject.fetchArray().length == 0) {Alert.alert('No Item Selected');} else {this.setState(() => {return {pickedElements: CheckedArrObject.fetchArray().map(res => res.value).join()}});}}render() {return (<View style={styles.CheckboxContainer}><Checkbox size={45}keyValue={1}checked={true}color="#E81E63"labelColor="#000000"label="1st Item"value="1st"checkedObjArr={CheckedArrObject} /><Checkbox size={45}keyValue={2}checked={false}color="#3F50B5"labelColor="#000000"label="2nd Iitem"value="2nd"checkedObjArr={CheckedArrObject} /><Checkbox size={45}keyValue={3}checked={true}color="#009688"labelColor="#000000"label="3rd Item"value="3rd"checkedObjArr={CheckedArrObject} /><Checkbox size={45}keyValue={4}checked={false}color="#FF9800"labelColor="#000000"label="4th Item"value="4th"checkedObjArr={CheckedArrObject} /><TouchableHighlight style={styles.showSelectedButton} onPress={this.renderSelectedElements}><Text style={styles.buttonText}>Checked Items</Text></TouchableHighlight><Text style={{ fontSize: 22, color: "#000", marginTop: 25 }}> {this.state.pickedElements} </Text></View>);}}Checkbox.propTypes = {keyValue: PropTypes.number.isRequired,size: PropTypes.number,color: PropTypes.string,label: PropTypes.string,value: PropTypes.string,checked: PropTypes.bool,labelColor: PropTypes.string,checkedObjArr: PropTypes.object.isRequired}Checkbox.defaultProps = {size: 32,checked: false,value: 'Default',label: 'Default',color: '#cecece',labelColor: '000000',}const styles = StyleSheet.create({CheckboxContainer: {flex: 1,padding: 22,alignItems: 'center',justifyContent: 'center',paddingTop: (Platform.OS === 'ios') ? 25 : 0},showSelectedButton: {padding: 20,marginTop: 25,alignSelf: 'stretch',backgroundColor: '#5D52FF'},buttonText: {fontSize: 20,color: '#ffffff',textAlign: 'center',alignSelf: 'stretch'},selectedUI: {flex: 1,justifyContent: 'center',alignItems: 'center'},checkboxTickImg: {width: '85%',height: '85%',tintColor: '#ffffff',resizeMode: 'contain'},uncheckedCheckbox: {flex: 1,backgroundColor: '#ffffff'},checkboxLabel: {fontSize: 18,paddingLeft: 15}});
Coming Soon…



Quick Links
Legal Stuff